How do I create a new event?
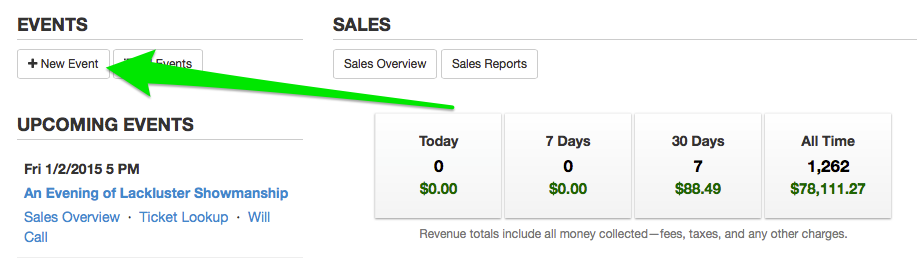
To create a new event, click the '+ New Event' button on the main page of your Dashboard.
Next, enter some basic information about your event. If things aren't set in stone, you can change event details later through the Details page in your Event Menu.
Basic Details

If your organization has a custom site, you'll see a Site drop-down menu. You can either associate your new event with the custom site, or leave it on the default site. If you don't see a menu, but are interested in a custom site for your organization, you can find more information here.
The next step is entering a title for your event. If you have a lot of information to convey ("So and so presents...", etc.), you may want to click the link underneath the Title field, which lets you add less prominent before- and after-title text.

The last step in the Basic Details section is selecting your venue. If the venue doesn't already exist in the drop-down, you'll need to select "Add a new venue..." and enter the name and address.
Date & Time

Set your event's start and end time here. If your event spans multiple days and each day has separate tickets, you'll probably want to create a separate event for each day, then group them under a parent event. For instructions on grouping events, click here.
Ticket Settings

Here, you'll set the global default settings for all tickets associated with your event.
- On-Sale Date: When you'd like your tickets to go on-sale. By default, tickets will start selling when the event is published.
- Off-Sale Date: When you'd like your tickets to go off-sale. No default setting.
- Delivery Methods: Which ticket delivery options you'd like to be available for your event. Available options are Print at Home, Will Call, and Mail.
- Min per Order: The minimum number of tickets that a customer can order at a time.
- Max per Order: The maximum number of tickets that a customer can order at a time.
- Attendee Names: If you will collect attendee names for each individual ticket sold for the event.
Many of these settings can be adjusted on a per-ticket basis as well, which is covered below.
Tickets

The first thing you'll see here is the Total Inventory field, which lets you set an event-wide cap on ticket sales. You can create exemptions on a per-ticket basis (more on that below), but this setting allows you to put a hard cap on attendance that encompasses multiple ticket types.
Example: You're running a beer tasting in a venue with a maximum capacity of 100 people. In addition to your general admission tickets, you're offering 25 VIP tickets that include extra drink tokens.
Even if your GA inventory is 100 and your VIP inventory is 25, with a Total Inventory value of 100 you'll never sell more tickets than the venue can hold. You might sell 95 GA tickets and 5 VIPs, or 75 GAs and 25 VIPs, but you'll never exceed 100 tickets total.
If you have additional questions about ticket inventory, click here.
Once your Total Inventory is defined, it's time to create your tickets! Click the 'Add a Ticket' button to get started.

Basic ticket settings are:
- Name: The name of the ticket type (General Admission, VIP, etc).
- Inventory: The maximum number of this ticket you want to be sold. If this field is left empty, it will default to whatever you entered above under Total Inventory. For events with a single type of ticket, those numbers will be the same. For events with multiple tickets, you'll want to make sure this is adjusted appropriately.
- Price: How much you want the ticket to cost before fees (and, if applicable, tax). The fees value will automatically update to reflect the price of the ticket.
If you click the 'Advanced Settings' link at the bottom of the ticket setup section, several more fields will appear:

- Ticket Description: Any additional details you'd like to share about your ticket that aren't included in the Name field (e.g. "Includes parking and early entry").
- Inventory Options: If you have multiple ticket types, the Separate Inventory checkbox allows you to exempt a ticket from counting toward your assigned Total Inventory value. Useful for things like offshoot events not covered under your general admission ticket, or for offering certain perks a la carte.
- On-Sale Date: If you want your ticket to go on-sale at a time other than the event default you set earlier, select "Customize for this ticket..." and adjust as desired.
- Off-Sale Date: Same as above. If you want this ticket to go off-sale at a time other than the event default, select "Customize for this ticket..." and adjust as desired.
- Delivery Methods: If you want this ticket to have different delivery options than your event's default setting, check "Customize for this ticket..." to make your changes.
- Min per Order: If you'd like a different minimum tickets-per-order limit than the event default, select "Customize for this ticket..." and enter the desired value.
- Max per Order: If you'd like a different maximum tickets-per-order limit than the event default, select "Customize for this ticket..." and enter the desired value.
Repeat this process for as many tickets as you'd like to be associated with your event. If you're still finalizing your plans, you can get set up and come back to add new tickets or change existing ones.
Features

The Features field is where you'll want to enter any special restrictions or accommodations your event may include. Things like "18+," "ASL Interpreted," or "Wheelchair Accessible" should be entered one at a time, and will be featured prominently just below the event title.
Description

Here, you can enter a summary of your event, as well as any other relevant information not covered above. You can format the description text however you'd like!
Images

Adding images to your event listing is optional. Images on your event page will fall into three categories: Cover Image, Poster Image, or Event Images. They're laid out as follows:

You're able to add multiple Event Images (and rearrange them after uploading), but only one Poster and Cover image.
Finishing Up
Once things are looking good, click 'Save' and your event will be created! You'll be taken to the event's Dashboard page, where you can make adjustments, add Promotion Codes, and put it online for public viewing.